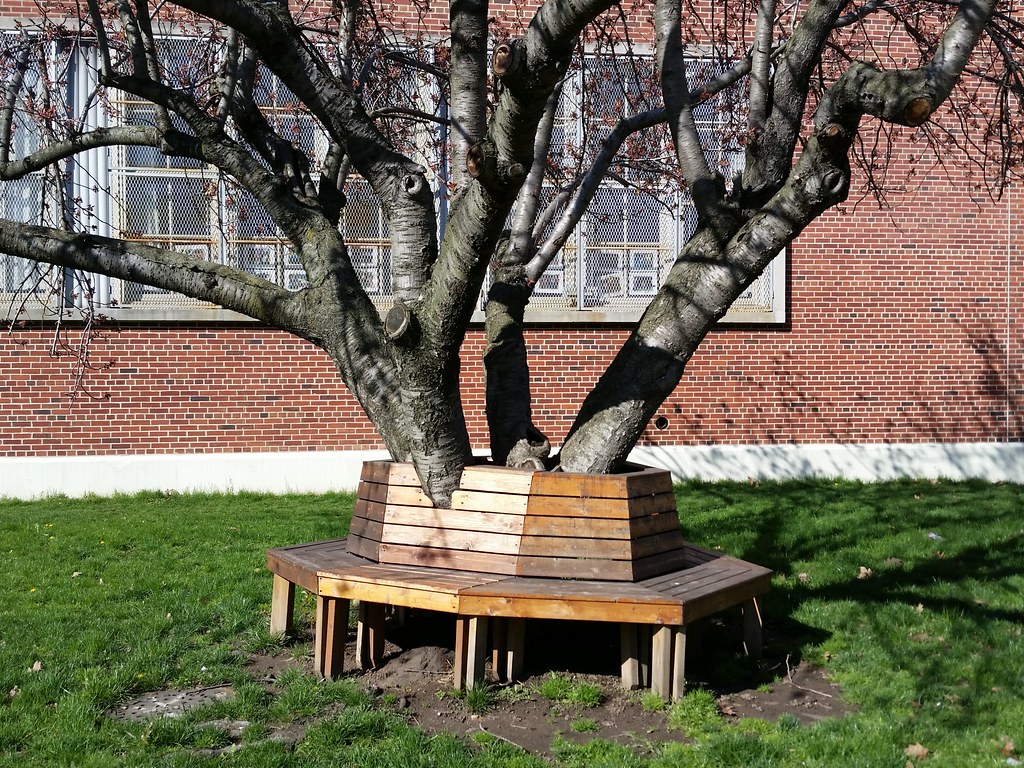
A tree bench does not only provide comfortable seating, but it also sets a rustic vibe to your garden. If you have a huge tree in your garden and are looking for a great spot to enjoy reading outside, here’s a step-by-step guide for building a tree bench.
Warning: This project is only recommended for those who have the necessary skills to lift heavy pieces and who are used to working with wood.
Building a Tree Bench:
Materials you’ll need for this craft:
- Drill/driver
- Clamps
- Adjustable wrench
- Level (4 foot)
- Garden spade
- Sandpaper (120 grit)
- Spade bit 3/8 inch
- Miter saw
Instructions on how to make the tree bench:
Step 1:
The bench will be constructed from six equal-sized parts. At the seat’s height, measure the diameter of the tree in inches (16 to 18 inches). To allow for growth, add 6 inches for a mature tree and 12 inches for a young tree. Divide the amount by 1.75 to get the length of the inner seat boards’ short sides. Mark this length on a spare piece of wood or cardboard, then cut the ends at opposing degree angles so that the other side is longer. Five additional template pieces should be cut to size. Check for fit by attaching the pieces around the tree with clamps or scrap timber, then adjusting as necessary.
Step 2:
Cut an inner seat board from 54×6 decking using a portion of the pattern. As indicated, lay three boards parallel to it, separated by 14-inch spacers. Place two pieces of scrap lumber atop the boards and trace the cut lines onto the uncut boards, following the angled cuts on the inner seat board.
Step 3:
Set the miter saw to a 30 degree angle. Cut the three seat boards that you marked in the previous step to length, with opposing angles on both ends. Using the four seat boards as a reference, measure and cut five more boards of each size to complete the seat boards for the bench’s six parts.
Little Note: You can use a stop block with your saw to size the cuts when cutting multiple equal-size parts, and try shifting them about in layout to find the optimum fit before sanding joints or cutting additional pieces.
Step 4:
Arrange the seat boards on a level surface in a hexagonal form, with 14-inch spacers between them, as illustrated. Align and adjust the joints between the inner seat boards first. Then, one by one, tweak the rings of boards until the joints are aligned and the pieces fit together.
Step 5:
The leg assemblies are made up of outer and inner legs that are placed between two stringers. Cut 12 legs to the height of the bench, less the thickness of the seat boards, from 2×6 framework. (If the ground around the tree is not even, lengthen the legs so you may later level the bench by digging out soil beneath them.) Measure the distance between the cut end of an inner seat board and the long point of the outer seat board. Remove around three inches to allow for a reveal and an apron. Cut 12 stringers to this length from decking. Then, proceed to cut a 30-degree miter off the front end of each stringer where the apron will be connected.
Step 6:
Measure around two inches from the front edge of an outer leg with a Speed Square and draw a vertical mark on the flat surface of the leg at this location. Rep on the other side of the leg. Sandwich the leg between two stringers, flush at the top, with the long ends flat on the leg and aligned with the markings you drew. Insert the inner leg between the stringers, keeping it parallel to and at least a few inches away from the outer leg with a spacer.
Clamp the pieces to the work surface, which should be on top of a scrap block of wood. Then, through the stringers and inner leg, drill two staggered, diagonally offset holes.
Step 7:
Insert a 38×4-inch carriage bolt through each hole created in the previous step. Secure each bolt with a washer and nut using an adjustable wrench. Rep these processes for the other five leg assembly.
Step 8:
After you’ve assembled all the sections, attach them. Then, put a level on the constructed bench’s seat. Remove soil beneath the legs with a garden spade until the seat is level.