As you know, it is essential to carry out the necessary maintenance and replacements in your gutter system to ensure that it works perfectly. How about taking advantage of old downspouts to make a super cool planter? You will be able, at once, to recycle the gutters and create a beautiful space in your patio or garden in which to put your favorite flowers. Next, we explain step by step everything you have to do to create a planter with gutters, as well as the different designs you can choose from and all the possibilities that this activity offers you. Even if you are crafty, you can install a drip irrigation system with a timer, which will help you keep your plants always hydrated.
You will need :
-
Gutters;
-
Paintings;
-
Land;
-
Plants;
-
Gutter gripping brackets;
-
An irrigation kit with a programmer;
-
Tools;
-
Nylon plug;
Step 1: Design Your Own Gutter
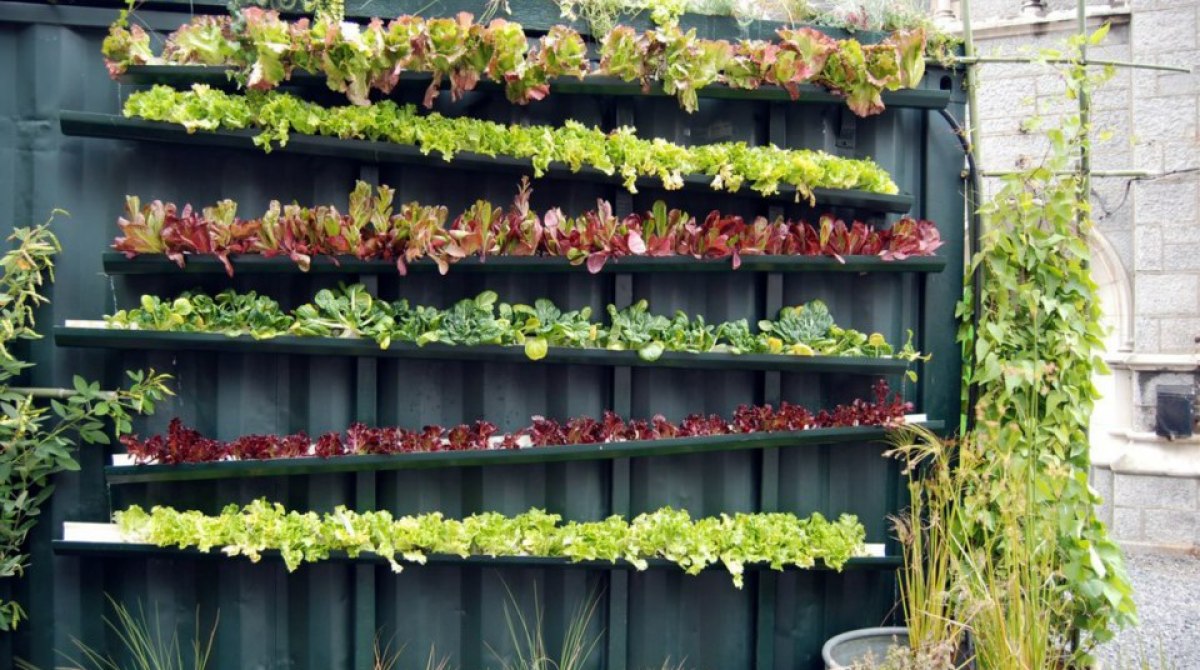
To start, design your own gutter as you want. Cut the pipe meticulously, then place them in a suitable location. To carry out this task, you can help yourself with a tape measure and a jigsaw, especially if the gutter is made of plastic. There are several options when designing a planter with gutters that depend only on your taste and needs: you can make hanging pots, standing, screwed to the wall, a vertical garden. To choose the one that best suits your needs, you must first consider the space you have and the number of gutters you are going to use.
Step 2: Mark the Drainage Points
Next, mark the drainage points where the excess water will fall. These holes are essential to prevent the roots from rotting. Make three holes per gutter, using a drill and a specific bit for this type of material. Then, with a felt polishing sander, go over the cuts well and buff the caps.
Step 3: Put Caps on the Sides
Carefully place lids on the gutters’ sides to close them tightly and turn them into a planter. Apply an adhesive to the inside of the caps and put them in place to fit correctly. Once the drying time has elapsed, you can proceed to apply the enamel.
Step 4: Paint the Gutter
Once the adhesive has done its job, paint the gutter the color you like best. In this case, our recommendation is to work with special paints that are suitable for the surface of the gutters. Use a roller and apply an all-purpose primer. With this product, you will improve the adhesion of the enamel.
Step 5: Install a Drip Irrigation System
Do you want to facilitate the care of plants? Begin by making mounting holes for the staples that will secure the main tube to the wall. Then, with the hammer, insert the dowels into the holes. Then, with the screwdriver and a suitable bit, fix the pipe supports well, with their corresponding lag screws. Connect the drip controller to the water tap and attach the main tube. Then drill the holes for the branch pipes. To do this, use a punch and then connect the secondary tubes, one for each gutter. Fit the pieces into the brackets.
Step 6: Fill with Soil
Now fill the pot with soil. Cover the planter halfway with soil so you can set the plants. Next, cut the tube and place a dropper in the desired location. Connect the tube and cut again to put the next dropper. In this way, you will be able to place the pieces you need to supply the irrigation adequately.
Step 7: Place the Plants
Once you have verified that the installation works correctly, place plants and flowers in the pots, all the plants you have chosen in the gutters. We also recommend using them for aromatic plants, since it is a very suitable support for these types of plants. Ready, the job is finished. In a simple way and taking advantage of all the recommended material, you have managed to create decorative pots with gutters to decorate any outdoor space.