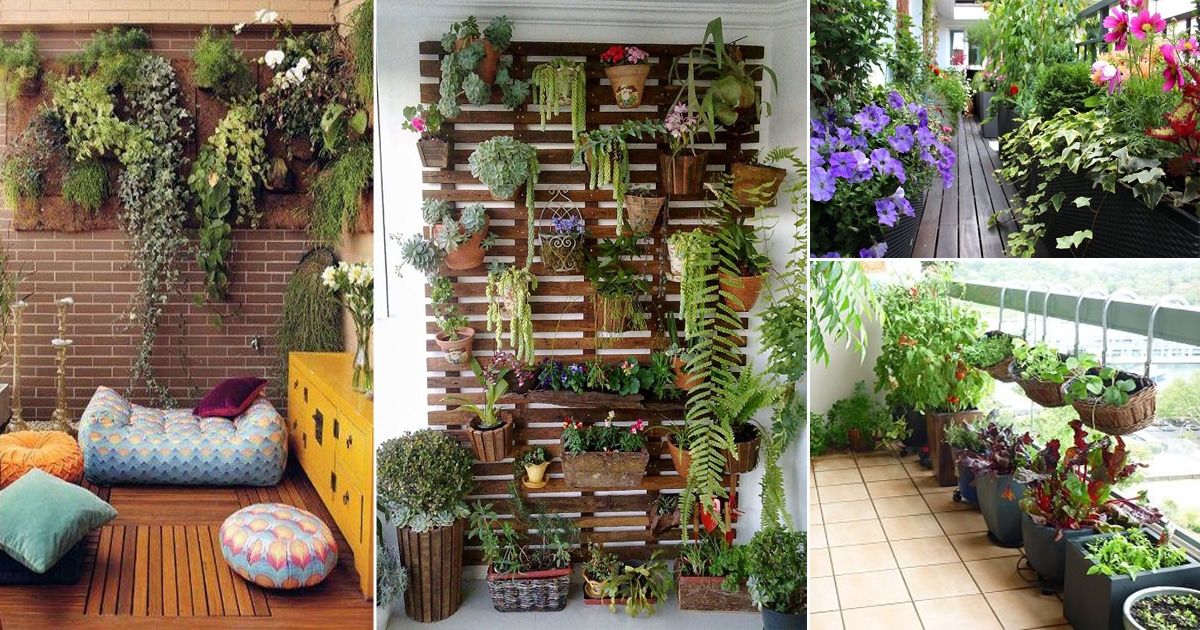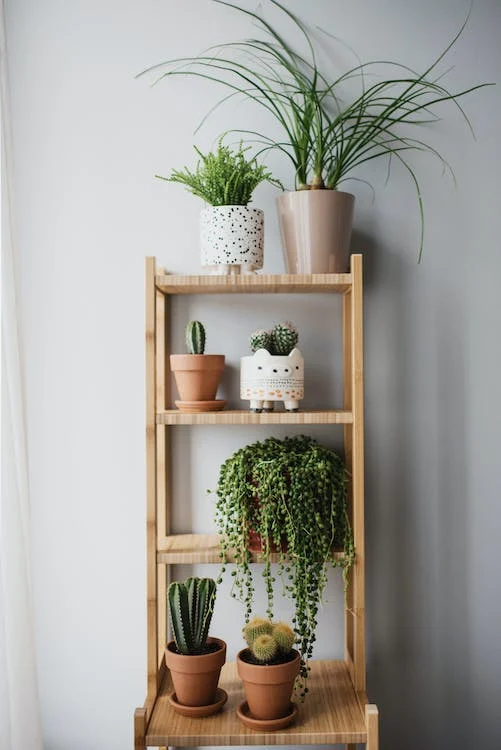
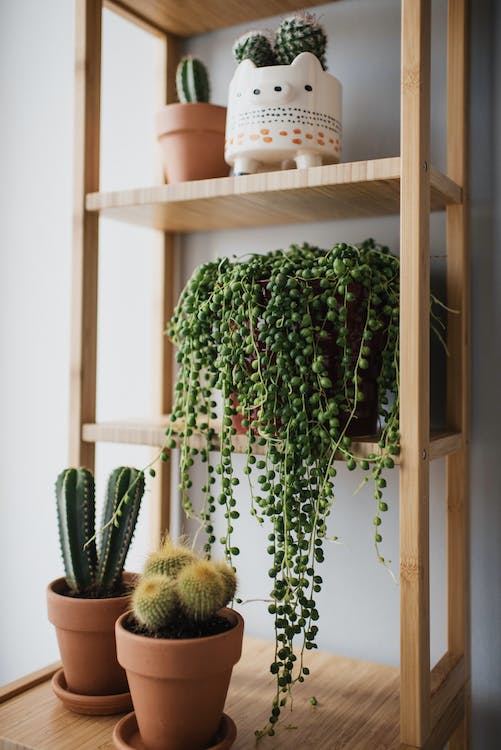
How to Create a Stunning Plant Shelf: A Step-by-Step Guide for Green Enthusiasts
Are you dreaming of a lush green oasis on your balcony or terrace, but limited by space? Look no further! By building a plant shelf, you can showcase your beautiful plants and create a stunning display. This simple DIY project requires just a few materials and some basic woodworking skills. Follow our step-by-step guide to bring your plant shelf to life and transform your outdoor space.
Step 1: Smooth the Boards for a Splinter-Free Finish
Before getting started, ensure the boards are smooth and splinter-free. Use coarse-grain sandpaper to sand down the boards, providing a safe and comfortable surface for your plants.
Step 2: Precise Wood Cutting for Perfect Fit
- Using a jigsaw, carefully cut the wooden boards into specific dimensions.
- Divide one plank into two uprights measuring 1.25 meters in height and 20 centimetres in width.
- Cut another plank into four shelves with dimensions of 0.6 meters in length and 20 centimetres in depth.
- From the remaining planks, create eight back supports measuring 0.6 meters in length and 10 centimetres in height.
- Additionally, cut eight cleats measuring 20 centimetres in length and 15 millimetres in height. Remember to sand the cut edges for a polished look.
Step 3: Design and Prepare the Plant Shelf Layout
- Mark the position of the four shelves on the two uprights, starting 10 centimetres from the floor and spacing them at 30 centimetre intervals.
- Create a cut line at the base of each upright, angling it slightly at around 15 degrees to the horizontal.
- Use a cardboard template to ensure consistent angling across all the shelves.
- Replace the perpendicular lines with the new angled lines. Proceed to saw along the cut lines to shape the base of both uprights.
Step 4: Assemble the Shelves with Precision
- Attach the eight cleats along the new angled lines, ensuring they are centred and slightly shorter than the depth of the shelves.
- Space the nails 5 centimetres apart for secure fastening. Lean the left-hand upright against a wall and enlist assistance to hold it in place.
- Start by nailing the bottom shelf to the bottom cleat, offsetting the nails slightly to avoid interfering with the ones already in place.
- Repeat this process, working your way up to the top shelf. Once completed, secure the second upright in position.
- Repeat the assembly process to attach the shelves to the cleats on the right-hand upright.
- The end result will be a sturdy shelf structure, perfectly horizontal when resting against the wall.
Step 5: Enhance Stability with Back Supports
To ensure stability and prevent plants from tipping over, nail a back support at each shelf level, positioning them 10 centimetres above the shelf and against both uprights. These back supports act as a barrier, providing added security for your plants. Finally, apply a desired finish, such as wood varnish, to enhance the beauty of the wood.
Create Your Own Plant Shelf Oasis Today!
With this comprehensive guide, you have all the necessary steps to build a stunning plant shelf that will showcase your greenery and elevate your outdoor space. Embrace the joy of gardening in limited areas and transform your balcony or terrace into a thriving plant sanctuary. Get ready to enjoy the beauty and tranquillity of your very own plant shelf oasis.
Materials Needed for Your Plant Shelf:
- Cardboard
- Man-head nails
- Mason’s pencil
- Wood varnish
- Hammer
- Tape measure
- Sanding paper
- Wooden boards
- Jigsaw